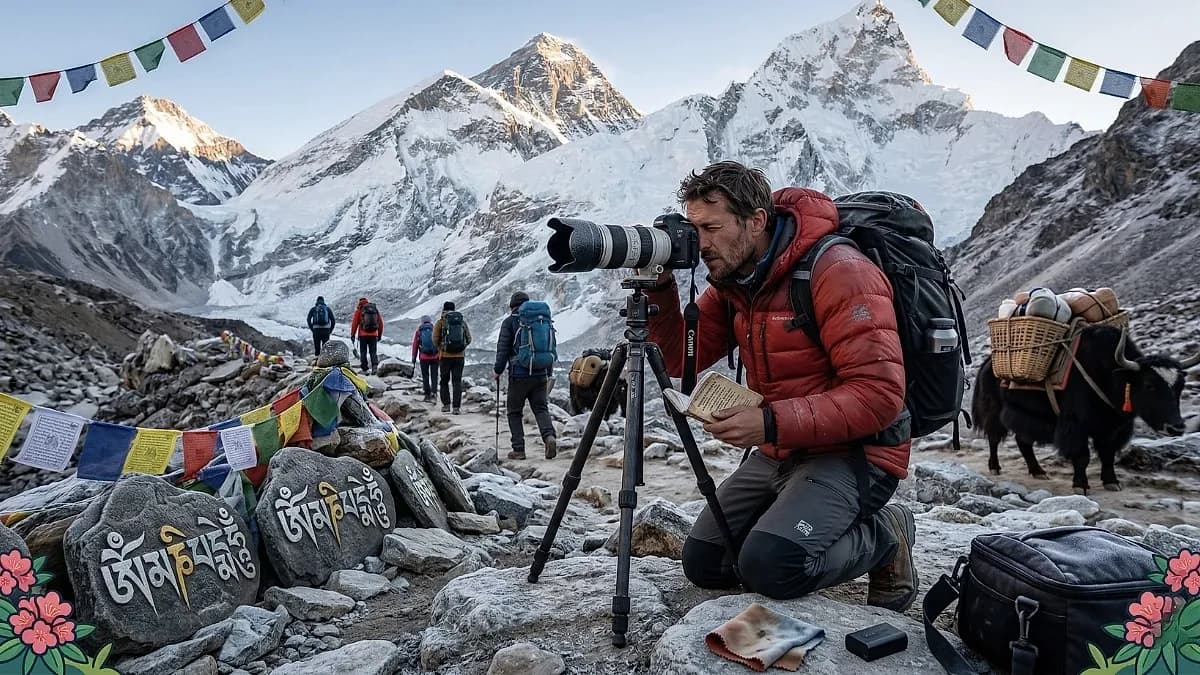
The first morning above Namche Bazaar, the clouds part and Everest appears. It fills the gap between two ridgelines, a white triangle against blue-black sky, impossibly high, impossibly far, impossibly real. You reach for your camera. You frame the shot. You adjust the exposure. You take the photograph. You look at the screen. And you realise, with a specific disappointment that every mountain photographer knows, that the photograph is a lie. Not because it is inaccurate, the mountain is there, the sky is there, the proportions are correct, but because it is flat. Two-dimensional. A rectangle that contains the image of Everest but not the thrill of it. Not the cold wind on your face. Not the thin air in your lungs. Not the scale that makes your body feel like a comma in a sentence written by geology.
This is the fundamental challenge of photography in the Himalayas: the experience is three-dimensional, emotional, physical, and temporal, and the camera captures only one dimension of it. The good news is that this challenge has solutions, techniques, equipment choices, and compositional strategies that close the gap between what you see and what your camera records. The better news is that the Himalayas are so photogenic that even mediocre technique produces images that look extraordinary to anyone who was not there.
What camera should I bring on a Nepal trek?
The first decision is what to carry. Every gram matters on a trek where you are walking six to eight hours per day at altitude, and camera gear is heavy. The choice is between three broad categories, and the right answer depends on your priorities.
Smartphone only. Modern smartphones, iPhone 15/16 Pro, Samsung Galaxy S24/S25 Ultra, Google Pixel 8/9 Pro, produce images that are genuinely excellent in good light. The computational photography (HDR processing, multi-frame noise reduction, portrait mode) compensates for the small sensor in ways that would have been impossible five years ago. The advantages: zero extra weight, always accessible, instant sharing capability. The disadvantages: limited zoom range (though telephoto lenses are improving), poor performance in low light (dawn and dusk, when the best mountain light occurs), no manual control over exposure in challenging conditions, and battery life that plummets in cold altitude air.
For the trekker whose priority is the trek rather than the photography, a smartphone is sufficient. The images will be good. They will not be great in challenging light, but they will be more than adequate for personal memory and social media.
Mirrorless camera with one or two lenses. This is the sweet spot for serious photography without expedition-level commitment. A modern mirrorless body (Sony A7C, Fujifilm X-T5, Canon R6/R8, Nikon Z6) with a wide-angle zoom (16-35mm or equivalent) and a telephoto zoom (70-200mm or equivalent) covers ninety-five percent of mountain photography needs. Weight: approximately 1.5 to 2.5 kilograms for body plus two lenses. The advantages: dramatically better image quality than a smartphone in all conditions, manual control, interchangeable lenses for different compositions, and raw file capture for post-processing. The disadvantages: weight, bulk, the need to protect the gear from dust and moisture, and the cognitive load of managing camera settings while also managing altitude.
The compromise kit. One mirrorless body with one versatile zoom lens (24-105mm or 24-200mm) covers the widest range of situations with the least weight and complexity. You sacrifice the extreme wide-angle for landscapes and the long telephoto for distant peaks, but you gain simplicity and reduced weight. For most trekkers, this is the optimal balance.
When is the best light for mountain photography in Nepal?
Light in the Himalayas follows patterns that determine when to shoot and when to put the camera away.
Dawn (5:30-7:30 AM): The best light. The sun rises behind the eastern peaks and illuminates the western-facing mountains in warm, golden light. Everest from Kala Patthar. Machhapuchhre from Poon Hill. Annapurna from ABC. These are the iconic sunrise shots, and they are iconic because the light at this hour is extraordinary, low-angle, warm, directional, and fleeting. Be in position before sunrise. Have your camera ready. The best light lasts fifteen to twenty minutes.
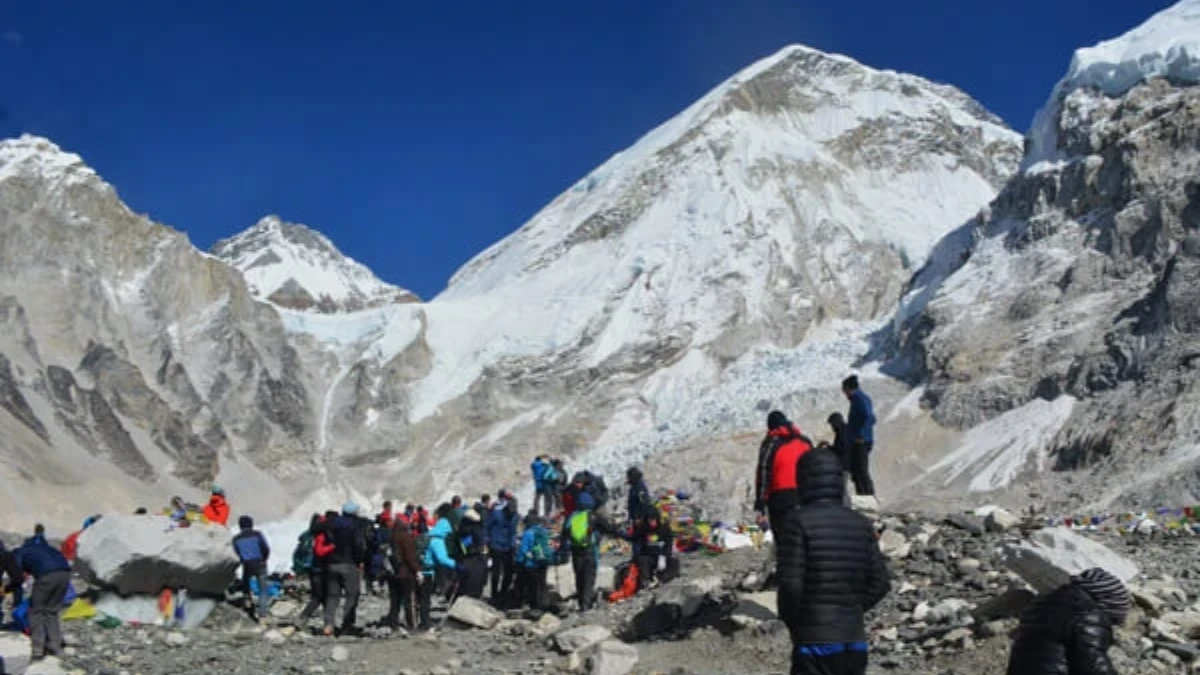
Morning (7:30-10:00 AM): Good light. The sun is higher but still directional. Shadows define the mountain faces. The air is clear. This is the best window for trail photography, the combination of good light, activity (trekkers on the trail, porters carrying loads, prayer flags in morning wind), and clear visibility.
Midday (10:00 AM-2:00 PM): Harsh light. The sun is directly overhead, shadows are minimal, and the mountains look flat. This is the worst time for landscape photography and the best time to put the camera in your pack and focus on walking. Exception: overcast days, when the cloud cover acts as a giant diffuser and midday light becomes soft and even, good for portraits and detail shots.
Afternoon (2:00-4:30 PM): Deteriorating conditions during trekking season. Clouds build from the south, often obscuring the peaks. In spring, afternoon cloud is more common than in autumn. The combination of cloud, haze, and high sun makes afternoon the least productive period for mountain photography.
Sunset (4:30-5:30 PM): The second golden hour. If the peaks are clear, which they often are in October and November, the sunset light on the mountains is as spectacular as sunrise but warmer and more diffuse. Sunset from Namche Bazaar, with Kongde and Thamserku catching the last light, is one of the great mountain photography moments on the EBC trail.
Night: The Himalayan night sky, above 3,000 metres, far from any significant light pollution, is extraordinary. The Milky Way is visible as a dense band of stars. Long-exposure photography (fifteen to thirty seconds, wide aperture, high ISO) captures star fields that the naked eye can see but that the camera transforms into images of staggering beauty. A tripod or stable surface is essential. A remote shutter release or timer prevents camera shake.
How do you compose photos of the Himalayas?
The biggest mistake in mountain photography is pointing the camera at the mountain and pressing the button. The result is a photograph of a mountain against a sky, technically accurate and emotionally empty. The mountain is there. But there is nothing to anchor it, nothing to provide scale, nothing to tell the viewer what it feels like to stand where the photographer stood.
Include foreground. The most effective mountain photographs have three layers: foreground (something close, a prayer flag, a trail marker, a person, a teahouse roof), middle ground (the valley, the glacier, the terraced fields), and background (the peaks). The foreground provides scale and context. It tells the viewer how big the mountain is by showing how small the human-scale element is. A photograph of Everest with a trekker in the foreground is more powerful than a photograph of Everest alone, because the trekker provides the reference point that makes the mountain's scale comprehensible.
Use leading lines. Trails, rivers, ridgelines, and suspension bridges create natural lines that draw the viewer's eye from the foreground to the mountain. The trail winding upward toward Tengboche Monastery with Ama Dablam behind. The suspension bridge spanning the Dudh Koshi with the Khumbu peaks above. These compositions use the geometry of the landscape to create visual movement that a static mountain portrait lacks.
Shoot people. The human element transforms landscape photography into storytelling. The porter carrying a load up a steep trail. The guide pointing toward a peak. The trekker silhouetted against a dawn sky. The monk spinning a prayer wheel at Tengboche. These images capture not just the landscape but the thrill of being in it, which is, ultimately, what you came to Nepal to have.
Get low. The default photography posture, standing upright, camera at eye level, produces images from a perspective that the viewer's brain registers as "normal" and therefore uninteresting. Getting low, crouching, kneeling, even lying on the ground, changes the perspective dramatically. Wildflowers in the foreground become large and prominent. The trail stretches upward more dramatically. The sky becomes a larger part of the frame. The image becomes interesting because the perspective is unusual.
Wait for weather. The best mountain photographs are not taken in perfect weather. They are taken in transitional weather, clouds parting to reveal a peak, mist swirling around a monastery, storm light illuminating a ridge while the valley below is in shadow. These are the moments that create drama, mood, and the emotional intensity that distinguishes a great photograph from a good one. When the weather changes, reach for the camera, not the rain jacket.
What Photography Challenges Do You Face at Altitude?
Battery life. Cold drains batteries. At minus ten degrees (common above 4,000 metres in autumn mornings and at high camps), a fully charged battery loses thirty to fifty percent of its capacity. Solutions: carry spare batteries in an inside pocket, close to your body, where your body heat keeps them warm. Rotate batteries, when one dies, warm it in your pocket while using the other. A power bank (minimum 20,000mAh) recharges camera batteries at teahouses where charging from the wall costs money and may not be available.
Dust and moisture. The trail generates dust. River crossings, rain, and snow generate moisture. Both are enemies of camera gear. A camera bag with a weather-sealed closure is essential. Lens cloths (carry several) remove dust from the front element. A silica gel packet in the camera bag absorbs moisture. Change lenses inside the teahouse, not on the trail where wind carries dust directly into the camera body.
Altitude and cognition. Above 4,000 metres, your brain works slower. Camera settings that you adjust automatically at sea level require conscious effort at altitude. Simplify your shooting: set the camera to aperture priority mode, choose a reasonable ISO (auto ISO with a maximum of 3200), and focus on composition rather than technical settings. The camera's automatic exposure is good enough for ninety percent of situations, and the cognitive load saved by trusting it is better spent on looking at the landscape and choosing what to photograph.
Gloves and camera controls. Thick gloves and small camera buttons do not coexist. Thin liner gloves work with touchscreens and allow access to camera dials but do not keep hands warm at altitude. The compromise: thick gloves for walking, liner gloves for shooting, and the acceptance that your hands will be cold every time you take a photograph above 4,500 metres. Some photographers use fingerless gloves with fold-back mitten tips, warm when walking, dexterous when shooting.
Is it ethical to photograph people on Nepal treks?
Photograph people with permission. This is non-negotiable. The porter under a massive load, the child in the village doorway, the monk at prayer, all are powerful subjects, and all are people whose consent matters. A gesture toward the camera with raised eyebrows is sufficient, if they nod, shoot. If they turn away, respect the refusal.
Do not photograph religious ceremonies without permission. Some ceremonies are public and welcoming of cameras. Some are private and sacred. Ask your guide before shooting.
Do not alter the landscape for a photograph. Moving prayer flags, rearranging stones, or trampling vegetation to get a better angle is disrespectful to the environment and the culture.
Share your photographs with the people in them. Show the teahouse owner the portrait you took. Email the photograph to the guide who posed for you. The image is a gift that costs you nothing to give and that means more to the subject than you might expect.
When should you put the camera down on a Nepal trek?
Off. The most important thing your camera can be is off, stored in your pack while you look at the mountains with your eyes rather than through a viewfinder. The Himalayas deserve your full attention. The sunrise at Kala Patthar deserves thirty seconds of unmediated, unframed, unrecorded looking before you reach for the camera.
The photograph is a memory aid. It is not the memory. The memory is the cold air in your lungs, the sound of prayer flags in the wind, the weight of the pack on your shoulders, the taste of tea at four thousand metres, and the specific, physical, unreproducible sensation of standing in the presence of mountains that dwarf everything you have ever seen. No photograph captures this. No photograph needs to. The photograph captures the image. You carry the experience. And the experience, decades from now, will be triggered by the photograph, not contained in it but called up from the place in your memory where the cold and the light and the altitude and the beauty have been waiting, perfectly preserved, for the moment you look at the image and remember what it felt like to be there.
Shoot thoughtfully. Shoot sparingly. And look, with your own eyes, in your own time, at your own pace, at the most photographed mountains on earth, knowing that the best image of the Himalayas is the one that no camera can take: the one your eyes see, your lungs breathe, and your memory keeps.
For the best photography treks, see the Everest Heli Photography Tour, Chitwan Photography Tour, and Bardia Photography Tour.
The best camera for a Nepal trek is the one you will actually carry. I have seen people bring full-frame DSLRs with three lenses and stop taking photos by day four because the weight killed the joy. I have seen people take extraordinary images on a phone. The mountains do not care what you are shooting with. They just ask you to look.
If you want photography-specific advice for your trek, our guides know every viewpoint on every trail. Just ask.
WhatsApp:+977 9810351300
Email:[email protected]
Written by Shreejan Simkhada, CEO of The Everest Holiday and third-generation Himalayan guide. TAAN Member #1586.
Capturing the mountains — book private for the right pace. Our Everest Base Camp Trek (12 Days) is private (your group only, no strangers), 2026 dates open, From USD $1399. WhatsApp us for tailored 2026 dates and current departures.